Last updated on January 6th, 2017
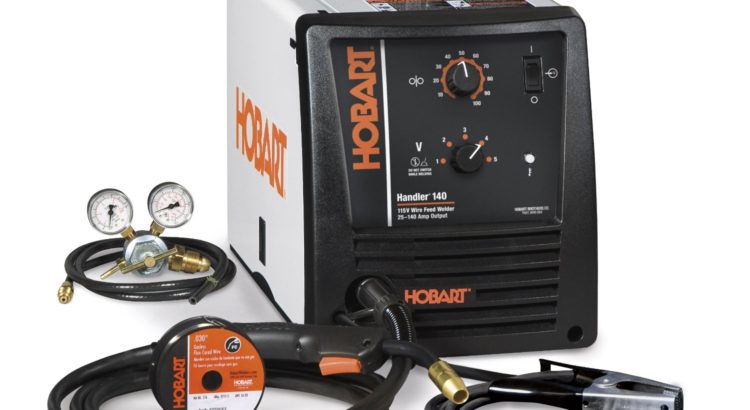
Should you buy the Hobart 140 MIG welder? Check out the video or read the text version of the Hobart Handler 140 review below for the welds and beads you can achieve with this 115V wire feed welding machine.
Click the video below to watch Hobart Handler 140 (500559) in action:
How does the Handler 140 compare to other 110V MIG welders?
Click here for the MIG welders comparison table and reviews.
What are other welders saying about this machine?
Click here to read reviews from Hobart 140 welder owners on Amazon.
Check out the latest price and buy Hobart Handler 140 welder on Amazon:
Hobart Handler 140 review
Today we will be doing some welding and a review of a Hobart Handler 140, 115 volts MIG welder. In my last video I had just purchased it and started doing a video of welding with it right off the bat. I was having some trouble with it, even though I went through the setup with the machine two times and thought I had verified everything. I actually made a mistake and wasn’t able to find that mistake until after I’d already put out the video.
My error setting up the machine
Initially, I was really disappointed with the performance of the Hobart Handler 140 welder, but after discovering my error in setting up the machine, I was able to make some really nice beads with it. I’m not disappointed with the machine at all, especially for the $500 price tag and being made in the USA (about Hobart). Today we’re going to do some welding with it, and a short review.
1/4″ steel, first bead
Quarter inch is the Hobart Handler 140’s maximum rated welding potential for material thickness, and they also suggest with using solid core wire in the particular gas, gold gas that I’m using, to do this in multiple passes. I wanted to see if we could do it in one. This was the first bead I made, doing just a pause motion like this. As you can see it looks a little [inaudible 00:01:31], it’s not real big. When I did that one though, it then heated the metal so the next bead burned in better, which is this one here.
Max output test
For that I actually made, I don’t remember if it was overhand circles like that, or maybe it was underhand, I don’t know. Anyway, that is not a bad-looking bead for 115 volt welder single pass on quarter inch. Now that this metal is all cold, let’s give it a shot again right here and see how it comes out. We’re using 030 wire. The machine is set the weld chart. We’re on 5, it’s maximum output and 50 on the wire speed. We will be doing some overhand circles like that. [inaudible 00:02:28]. We’ll see how it comes out.
Single pass vs multiple passes
All right, here we go. All right, so that’s the bead, single pass on quarter inch metal with Hobart MIG welder 140. Now let’s add some multiple passes there like we were actually supposed to do on metal this thickness and see how it comes out. All right, there’s nothing to hide here. If you’re going to be welding quarter inch with 115 volt welder, I would recommend doing several passes. That’s three passes here. Once the metal is hot, you can get pretty good results in a single pass.
If I was at work using a big $8,000 or $10,000 welder, sure we can make real nice bead real quick in one pass on quarter inch, but for 115 volt welder, I don’t know what more you could ask for. That’s really good on metal of this thickness. One more little test here on the quarter inch. You’re welding this quarter inch flat bar to quarter inch plate. This half is beveled, this half is not.
We strung a straight stringer here, nice and slow, not oscillating, just to see what kind of bead we can leave on this metal. Again, this is really thick metal for 115 volt welder. For doing Jeep stuff or vehicle-related stuff. It’s very unlikely that you’re going to be welding anything more than quarter inch, if quarter inch for that matter. This one here is pulling the puddle like that inside the bevel. This bead here is pushing the puddle like that. With just really minimal pauses, basically just a smooth motion with very short pauses.
We’re going to do the same thing here, trying where it’s not beveled. You’re not even supposed to be welding a single pass according to the weld chart on quarter inch with this welder, but if you bevel your material like that, it’s not a super burned in super hot bead, but it’s definitely there. It’s not disappointing. It might [inaudible 00:05:38] 115 volt welder.
Now over here on the unbeveled side I will be doing some underhand circles, pushing the bead. We’ll see how that comes out and if it leaves a better bead on quarter inch than just a straight stringer. This is the last bead I just made doing a series of underhand circles or almost like U shapes underhand. This is also the non-beveled side of my flat bar. The bevel stops right there.
Impressed with beads (for a 110V welder)
By the time I got down here the metal is heated, but regardless, I’m impressed. For a 115 volt welder leaving beads like that on quarter inch material. That is absolutely awesome. I’m really pleased with that.
1/8″ material test
Now we’re getting more into the realm of what this welder is intended for. This is some eighth inch material here. Realistically this is probably the most common material thickness that you’re likely to be working with, with the exception of maybe three sixteenths plate or tube for steel bumpers, rock sliders, that kind of thing. For most practical applications eighth inch wall really stout stuff, at least in automotive.
Let’s fire this thing up and again, I’m going to change everything to the weld chart and keep it all on factory settings and see what we can do. Okay, this is the machine set to the factory weld chart on eighth inch material. With some time, a little bit more practice, I’m sure I can make better beads. I tried turning the machine down right here and it was just a little cold. On this side I started to adjust the wire feed speed and turned it up here. All in all, it’s fine. It’s not perfectly consistent because it’s me messing with the machine. That machine is very capable. I’m not disappointed with it at all.
14 gauge test
Now we’re going to step it down even further and weld some 14 gauge. It’s real thin stuff. This is representational of most exhaust pipes and that kind of stuff. We’re going to weld this with a little bit of a gap, because I don’t know about you guys, but it seems to me like any time I’m welding exhaust, I always have a gap to fill, so we’ll see what the machine can do.
I was running down hand in a straight motion, smooth as I can. It definitely looks good on the back side. I’ll show you here. Again this is fourteen gauge and the machine is set to the weld chart. This is a representational thickness of your exhaust pipe or sheet metal, that kind of stuff. Flip around here. That’s the back side, you can see it’s penetrated all the way through even running down hand, which is good. Nice and solid.
That’s probably the thinnest metal that I would ever find myself welding. The machine did really good on quarter inch, all the way down to fourteen gauge and thinner, if I had any. I’m happy with it. It’s doing really good. Here’s another bead I made with that welder off camera. This is also fourteen gauge tube. Running a straight stringer on it with small oscillations. This one here I already showed you. That was eighth inch with underhand circles, I believe.
Once I get a little more used to it, this machine will be a good addition to the tool arsenal for sure, especially for it’s size and portability.
The mistake I made when I first set up the welder is I read the manual. No, that’s not the mistake. I read the manual, and it comes ready to weld out of the box using flux core wire, which it also comes with. For the type of welding I like to do and will be doing the most of, I won’t have a need or use for flux core.
Comes set for flux core
I bought some gas and some solid wire, and to weld solid wire, you need to have the polarity on electro-positive. Since the machine comes set for flux core it’s also set on electro-negative. It should be at least. Without paying any attention to the polarity, where it actually was, knowing that it came set for flux core, I swapped the polarity around to what I thought was electro-positive and I was pretty positive with that.
Turns out it actually came from the factory set wrong for flux core, but set right for solid core wire, electro-positive and I swapped it around to electro-negative. When I started welding, and it wasn’t clear as day, it was welding kind of cold, but I could turn it up and make some decent-looking beads, but they weren’t penetrating. I should have known better, but this being my first time using 115 volt welder, I didn’t know what to expect.
Make sure you get the settings right
After doing that bumper job on my Jeep in the last video and uploading the video for you guys, I went back through again and double-checked everything for a third time, and finally realized that that’s what the problem is. After correcting that and actually welding on electro-positive with gas for solid-core wire, I’m pretty happy with this thing. It’s doing good. As long as you have reasonable expectations and know its limitations, it’s a really good unit for $500. I paid $500 for it out the door, it’s made in the USA. I don’t think you can go wrong for the price. I’m really happy with it.
All right guys, that’s it for me for today.
What next?
Check out Hobart Handler 140 on Amazon: